10.5. Launch a Tool
- Launch the latest version
- Launch particular Tool version
- Launch a Tool with "friendly" URL
- Launch a tool with "hosted" applications
- Instance management
- Restrictions
To launch a Tool you need to have EXECUTE permissions for it. For more information see 13. Permissions.
You also can launch a tool via CLI. See here.
Launch the latest version
- To run an instance with a selected Tool navigate to the Tools tab and click the Tool name.
- Click the Run button in the top-right corner of the screen and the latest version with default settings will be launched (these are defined for Cloud Pipeline globally).

- If you want to change settings, you shall click the arrow near the Run button → Custom settings.

- Launch tool page will be opened.

-
If the Price type is set as "On-demand" - at the Launch page, an additional checkbox Auto pause appears:

This checkbox allows to enable automatic pausing on-demand instance if it is not used. Such behavior could be controlled by Administrators using a set of parameters at System Preferences (see here).Please note, this checkbox will not be displayed if any cluster is configured ("Static" or "Autoscaled").
-
If the Price type is set as "On-demand" - at the Launch page, an additional control Maintenance appears. It allows to configure schedule for automatical pause/resume a tool run:

It could be useful when the tool is launched for a long time (several days/weeks) but it shall not stand idle, just increasing costs, in weekends and holidays, for example.
For more details, how to configure the automatically schedule for a run see 6.2. Launch a pipeline (item 5).Please note, the Maintenance control will not be displayed if any cluster is configured ("Static" or "Autoscaled").
Users (who have permissions to pause/resume a run) can create/view/modify/delete schedule rules anytime launched run is active via the Run logs page - for more details see 11. Manage runs.
-
Define the parameters in the Exec environment, Advanced and Parameters sections.
-
Click the Launch button in the top-right corner of the screen.

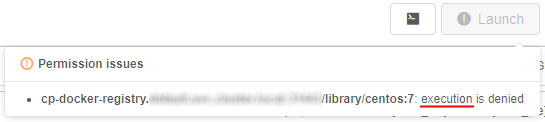
Please note, that the current user can launch a tool only if he/his group has corresponding permissions on that tool (for more information see 13. Permissions), but the Launch button may be disabled also for one of the following reasons:executionisn't allowed for specified docker image;readoperations aren't allowed for specified input or common path parameters;writeoperations aren't allowed for specified output path parameters.
In such cases, hover over the Launch button to view warning notification with a reason of a run forbiddance, e.g.:
Note: you can also launch a tool with the same settings via the
CLIcommand orAPIrequest.
To generate the corresponding command/request click the buttonnear the "Launch" button. For more details see here.
Launch particular Tool version
- To run a particular version click the Versions section.
- Select a version and click the Run button. The selected version with default settings will be launched (these are defined for Cloud Pipeline globally).

- If you want to change settings, you shall click the arrow near the Run button → Custom settings.

- Launch a tool page will be opened.
- Define the parameters.
- Click the "Launch" button.
Example 1
In this example, we will run the "Ubuntu" Tool with custom settings: 30 Gb hard drive, 4 CPU cores, and 16 Gb RAM.
Note: "Start idle" box is ticked to allow SSH access to the running Tool. To learn more about interactive services see 15. Interactive services.
Click the Launch button in the top-right corner of the screen when all parameters are set.

After the Tool is launched you will be redirected to the Runs tab:
- Click the Log button to see run details after instance finishes initialization.

- Wait until the SSH button will appear at the Run logs page, click it

- You will be redirected to the page with interactive shell session inside the Docker container. For example, we can list "/" directory content inside the container.

Launch a Tool with "friendly" URL
User can specify a "friendly"-format endpoint URL for persistent services. This produces the endpoint URL for the selected interactive service in a more friendly/descriptive format instead of the default general <host>/pipeline-<RunID>-<port>.
"Friendly" format can be configured before the specific service launch in the "Advanced" section of the Launch page.
This format has the following structure - <custom-host>/<friendly_url>, where:
<custom-host>- valid existing domain name. If it's not specified, the default host name will be used<friendly_url>- valid endpoint name. If it's not specified but the<custom-host>is specified - the final endpoint URL will be equal the<custom-host>only
Note: specified endpoint URL shall be unique among all active runs.
Example 2
In this example we will configure a pretty URL for RStudio Tool.
Note: for do that, user account shall be registered within CP users catalog and granted READ & EXECUTE permissions for the rstudio Tool.
- Navigate to the Tools tab.
- Select/find RStudio Tool in the list:

- At the opened page hover the "Run" button and click the appeared "Custom settings" point:

- Click the "Advanced" control (a), input desired "Friendly URL" (b) (name shall be unique) and then click the "Launch" button (c), e.g.:

- Open the Run logs page of RStudio Tool, wait until the tool successfully starts.
- Click the hyperlink opposite "Endpoint" label:

- In a new tab RStudio will be opened. Check that the URL is in the "pretty" format you specified at step 4:

Launch a tool with "hosted" applications
"Long-running" Cloud Pipeline applications may occasionally failed.
And one of the main task caused this situation - saving the internal access to the services (e.g. if a database was hosted) as the IP and name (which match the pod) are being changed during the default run restarts.
For that, there is a special option to assign an internal DNS name to the run.
Name of the service and a list of ports can be supplied by the user in the GUI, at the Launch form before the run:

Pop-up for DNS configuration for the upcoming run will appear:

To configure the internal DNS:
- specify the valid service name, e.g.:

- specify the origin port of the application that should be hosted, e.g.:

Please note, value of the Target port is being specified firstly the same as the origin Port value (automatically) - change the value of the Target port if needs, e.g.:

- if the configuration of an additional origin port is required, click the button "+ Add ports configuration":

Specify values for the additional port and its target port. If the configuration of an additional origin port is required, click the button "+ Add ports configuration" again. - to delete "extra" added port in the list, click the delete icon for it, e.g.:

- after the service is configured, click the Save button to confirm:

Configured DNS service is shown in the Advanced section of the Launch form:

Example of "hosted" application running
In the example below, we will run and "host" RStudio tool.
- Open the Tools page and find RStudio tool:

- At the tool's page, click the Settings tab:

Save endpoints' port values. - Select Run → Custom settings:

- At the Launch page, expand the Advanced section and click the Configure button near the "Internal DNS name" label:

- In the appeared pop-up, specify the service name, e.g.:

- Specify ports saved at step 2. To add the second port use "+ Add ports configuration" button:

Click the Save button. - Check that configured service is displayed at the Launch page:

- Click the Launch button and launch the run.
- Open the Run logs page of the just-launched run.
- FQDN of both configured services are shown in the GUI - at the Run logs page:

Currently, the format of the service FQDN is<service_name>.default.svc.cluster.local:<origin_port> - Wait until SSH hyperlink appears.
- Click the SSH hyperlink to open the Web-terminal.
- In the opened terminal, perform the command:
curl -I rstudio-example-service.default.svc.cluster.local:8788to view info about RStudio hosted service:

- Perform the command:
curl -I rstudio-example-service.default.svc.cluster.local:3838to view info about Shiny hosted service:

Instance management
Instance management allows to set restrictions on instance types and price types for tool runs.
User shall have ROLE_ADMIN or to be an OWNER of the Tool to launch Instance management panel. For more information see 13. Permissions.
To open Instance management panel:
- Click
 button in the left upper corner of the main tool page.
 - Click "Instance management":

- Such panel will be shown:

On this panel you can specify some restrictions on allowed instance types and price types for launching tool.
Here you can specify:
| Field | Description | Example |
|---|---|---|
| Allowed tool instance types mask | This mask restrict for a tool allowed instance types. | If you want for that tool only some of "large m5..." instances types will be able, mask would be m5*.large* In that case, before launching tool, dropdown list of available node types will be look like this:  |
| Allowed price types | In this field you may restrict, what price types will be allowed for a user. | If you want "On-demand" runs only for that tool will be able, select it in the dropdown list: In that case, before launching tool, dropdown list of price types will be look like this:  |
To apply set restrictions for a tool click  button.
Setting restrictions on allowed instance types/price types is a convenient way to minimize a number of invalid configurations runs.
Such restrictions could be set not only for a tool, but on another levels too.
In CP platform next hierarchy is set for applying of inputted allowed instance types (sorted by priority):
- User level (specified for a user on "User management" tab) (see v.0.14 - 12.4. Edit/delete a user)
- User group level (specified for a group (role) on "User management" tab. If a user is a member of several groups - list of allowed instances will be summarized across all the groups) (see v.0.14 - 12.6. Edit a group/role)
- Tool level (specified for a tool on "Instance management" panel) (see above)
- (global)
cluster.allowed.instance.types.docker(specified on "Cluster" tab in "Preferences" section of system-level settings) (see v.0.14 - 12.10. Manage system-level settings) - (global)
cluster.allowed.instance.types(specified on "Cluster" tab in "Preferences" section of system-level settings) (see v.0.14 - 12.10. Manage system-level settings)
Restrictions
Container size limits
Docker images can be extremely large. Therefore, Cloud Pipeline supports a mechanism to warn/reject users from launching of such big images.
To configure that mechanism, there is the special system preference - launch.tool.size.limits.
This preference has a format:
{
    "soft": <soft_limit_size>,
    "hard": <hard_limit_size>
}
This preference defines "soft" and "hard" limits for a Docker container size in bytes:
- if user tries to launch a tool and the size of its container exceeds "soft" limit - user will get warning notification, but can proceed the tool launch at their own risk
- if the size of a tool container exceeds "hard" limit - tool launch in this case will be unavailable
- if the size of any limit is set as
0- this means there is no limitation of that type
Example of the preference configuration:

In this example, there is no "soft" limit and "hard" limit is set as 1 GB.
In case, when "soft" limit is set more than 0 and user tries to launch some tool which container exceeds this limit, the following warning will appear:

At the same time, the launch operation is still available.
In case, when "hard" limit is set more than 0 and user tries to launch some tool which container exceeds this limit, the following error will appear:

Tool launch is unavailable.