8.9. Mount Cloud Data Storage to the local workstation
Introduction
Cloud Pipeline platform allows to mount data storages, located in the Cloud, to the local workstation as a network drive. This provides an easy way to manage files, that shall be processed in the Cloud or downloaded locally.
- Authenticate within Cloud Pipeline platform and obtain mapping token
- Map a storage as the network drive to the Windows workstation using built-in tools
- Map a storage using CyberDuck tool
Please consider the following limitations and prerequisites to map a network drive:

1. Network drive mapping is only supported for Windows workstations.
2. Internet Explorer 11 shall be used for Authentication section of this manual. Once authentication is done - Chrome or other web-browser can be used to further work.
3. Only NFS data storages (e.g. EFS/NFS/SMB) can be mapped to the local workstation. S3/AZ/GCP storages are not supported.
4. The following limits are applied to the data transfer:
   - Max 500 Mb per file
   - Max transfer duration: 30 min
5. The following requirements shall be set for the user account:
    - User shall be granted write permissions to any of the NFS data storages
Authenticate within Cloud Pipeline platform and obtain mapping token
- Open Internet Explorer web-browser
- Navigate to the Cloud Pipeline GUI -
https://<cloud pipeline adress>/pipeline/ - Click the Settings button in the left menu

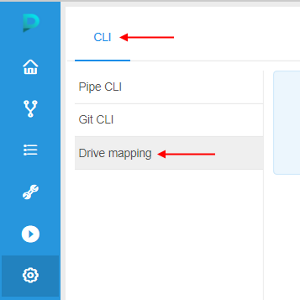
- Navigate to the CLI tab and select Drive mapping section in the left menu:
- Authentication prompt will be shown:
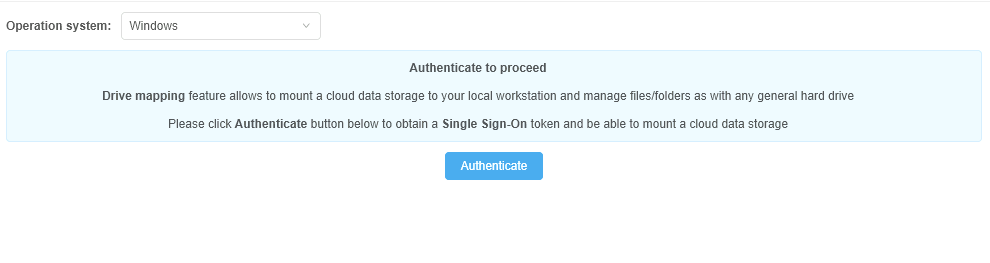
- Click the Authenticate button
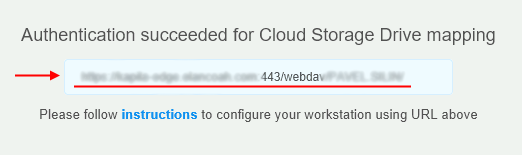
- If authentication succeeds you will see a popup window with a link to map a network drive. Copy the URL shown in the popup, it will be used in the workstation configuration section:
Map a storage as the network drive to the Windows workstation using built-in tools
- Open This PC (My Computer) view
- Click the Map network drive button:
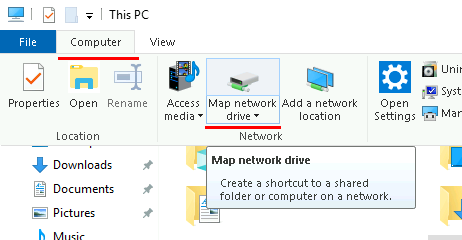
- Map Network Drive dialog will be shown:
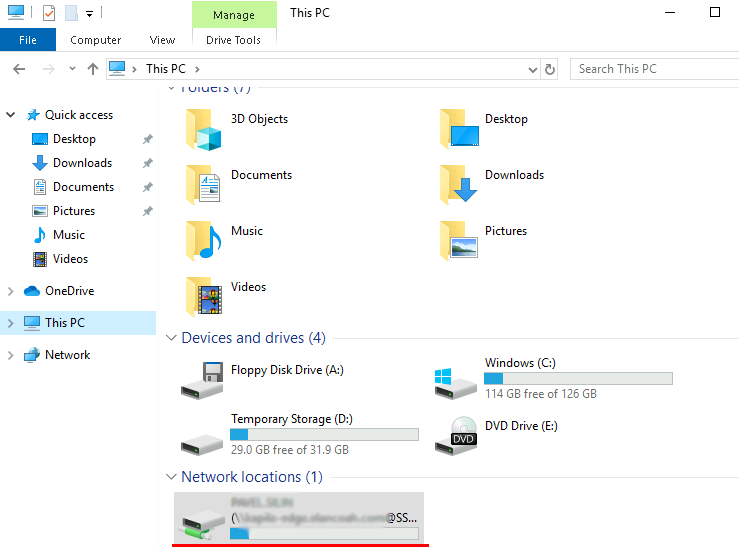
- Select a Drive letter (it will be used to address a drive, e.g.
Z:\) or keep the default value for the "Drive" field - Paste a mapping URL (obtained from the Cloud Pipeline authentication dialog) into the "Folder" field
- Tick "Reconnect at logon" checkbox
- Click the Finish button:

- Select a Drive letter (it will be used to address a drive, e.g.
- Drive will be mapped and opened. Further you can address it using a Drive letter set above (e.g.
Z:\):
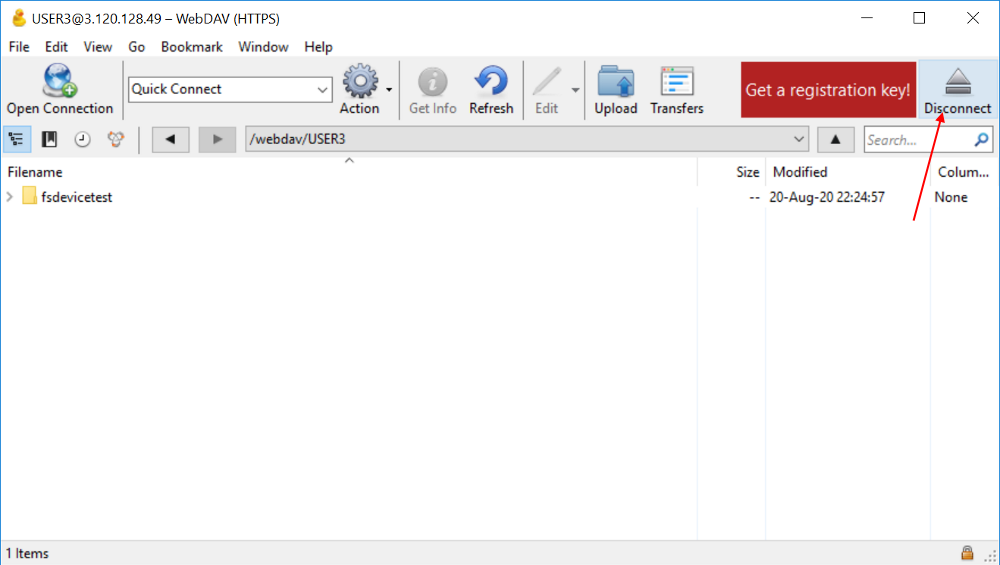
Map a storage using CyberDuck tool
Prerequisites: get a mapping URL by the way described above.
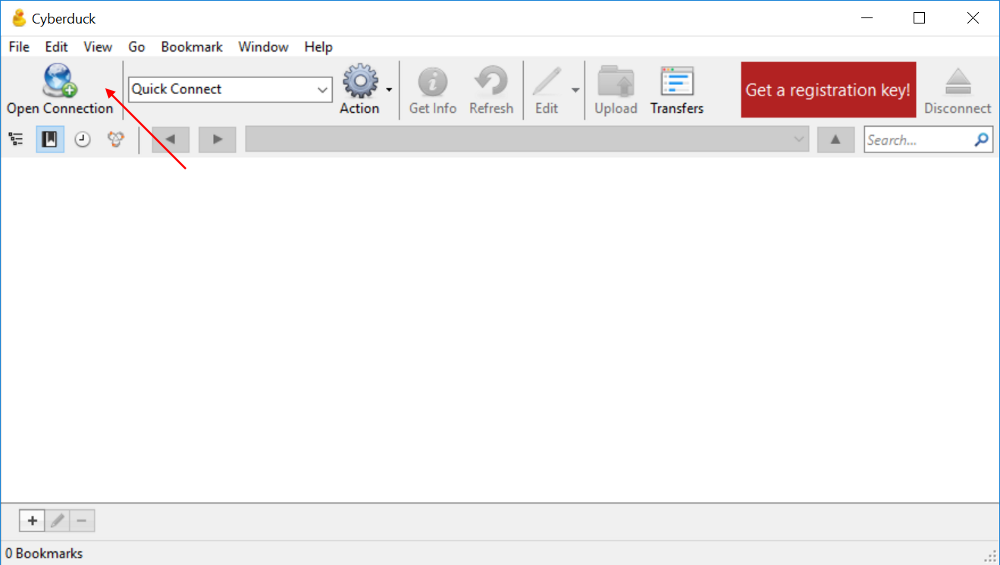
- Launch
CyberDucktool. - Click the Open Connection button:
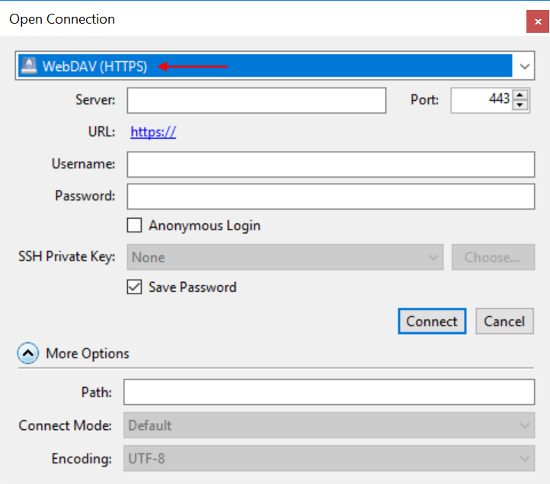
- In the appeared popup, click the upper dropdown list with connection types:
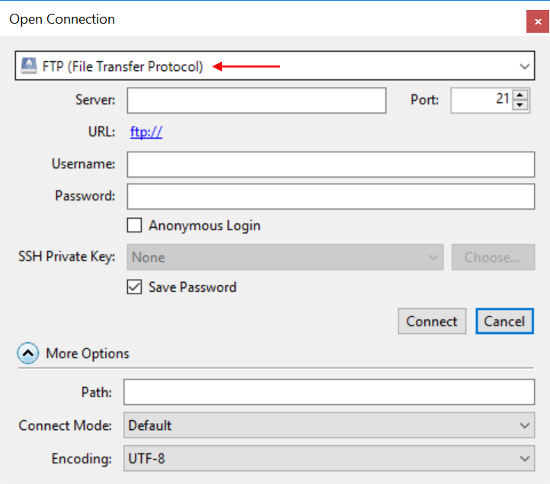
- Select the item "WebDAV (HTTPS)":
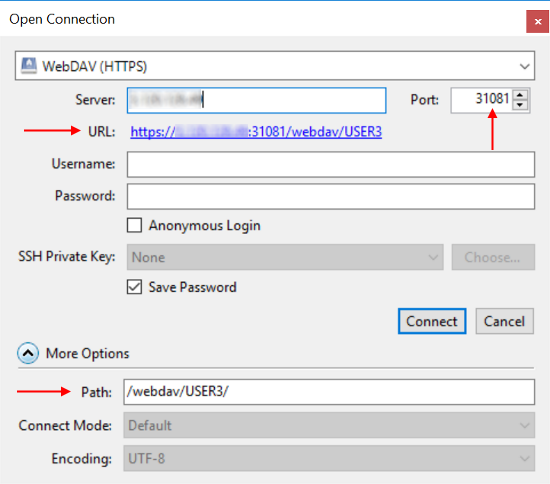
- Paste a mapping URL (from the prerequisites) into the "Server" field. Fields "URL", "Port", "Path" will be filled in automatically:
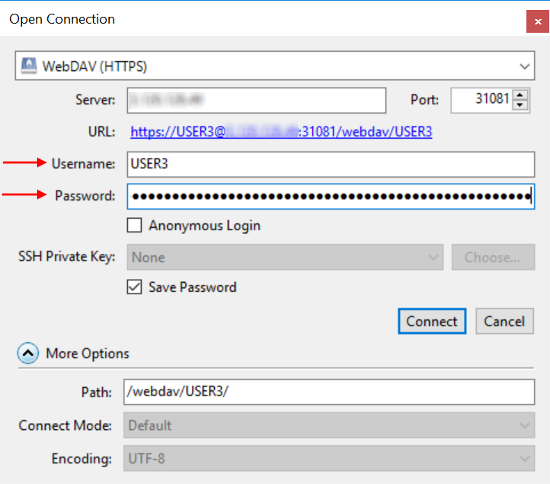
- Specify your Cloud Pipeline credentials - username into the "Username" field, access key into the "Password" field:
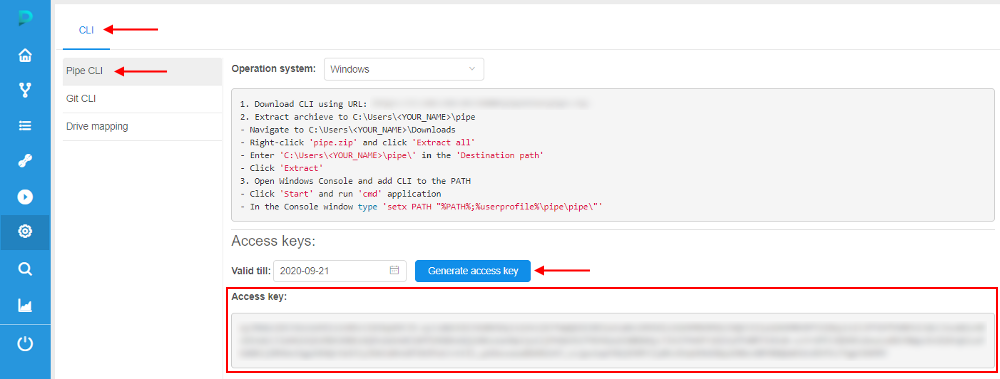
Note: to get your access token - open System Settings, then CLI tab, and in the sub-tab Pipe CLI, click the "Generate access key" button:
- Click the Connect button to confirm.
- After authentication will be done, all available to the user FS mounts will appear:
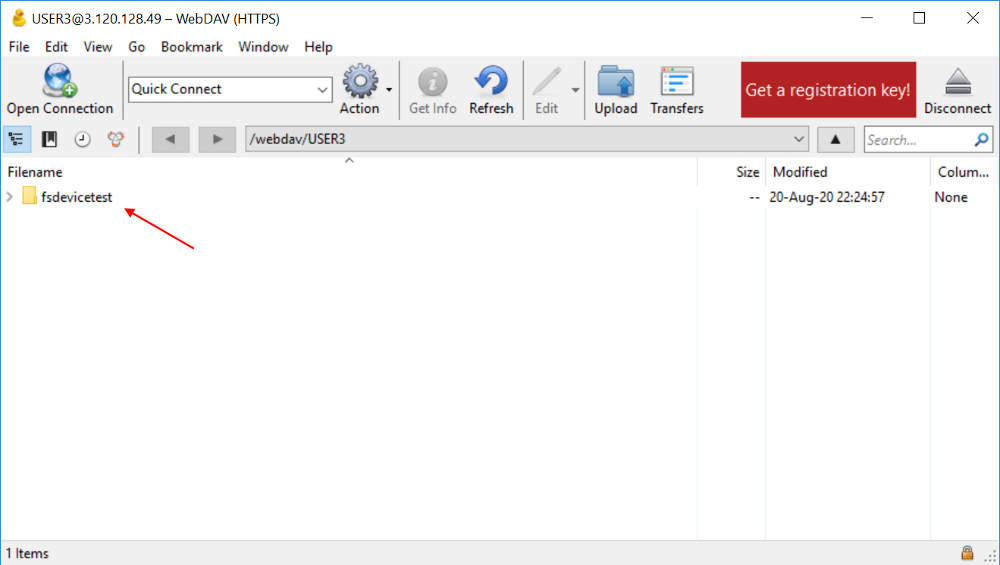
They are displayed as folders. - Double-click the folder you wish - FS storage content will appear, e.g.:
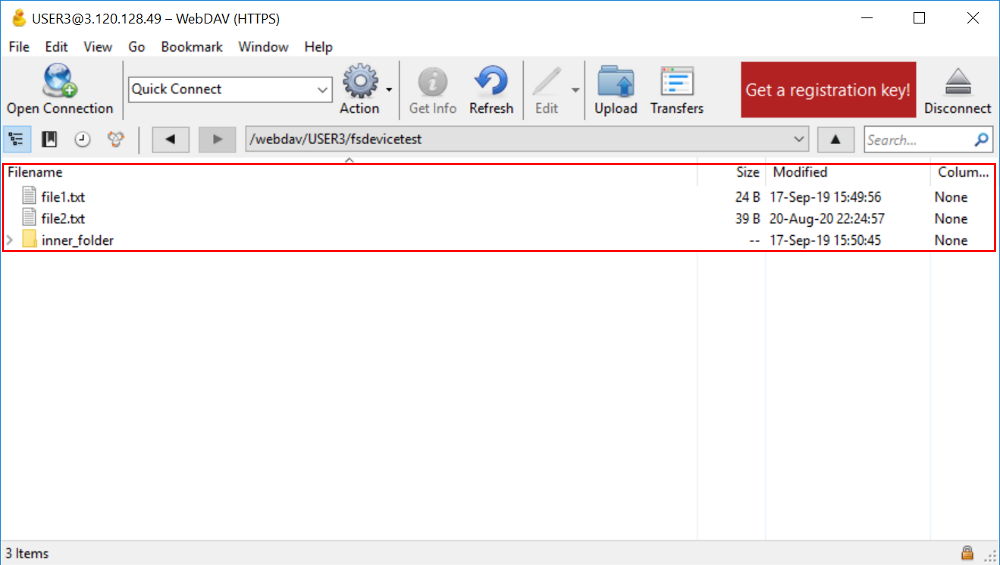
- In this window, you can manage files/folders as in any file commander, according to your permissions on that FS mount. More about
Cyberduckfunctionality you may see here. - After all, close the connection: