1. Quick start
To launch a Pipeline you need to have EXECUTE permissions for that Pipeline. For more information see 13. Permissions.
This quick start will help you to get a general idea of data processing via the Cloud Pipeline platform. Pipelines are set of data processing steps that are dependent on each other. Here we will describe an example of a pipeline launch.
Note: Pipeline launch steps remain the same for different pipelines.
Pipeline running procedure for basic users
- The first step you need to perform is to upload the data that you will work with. Generally, data in the Cloud Pipeline is kept in data storages.
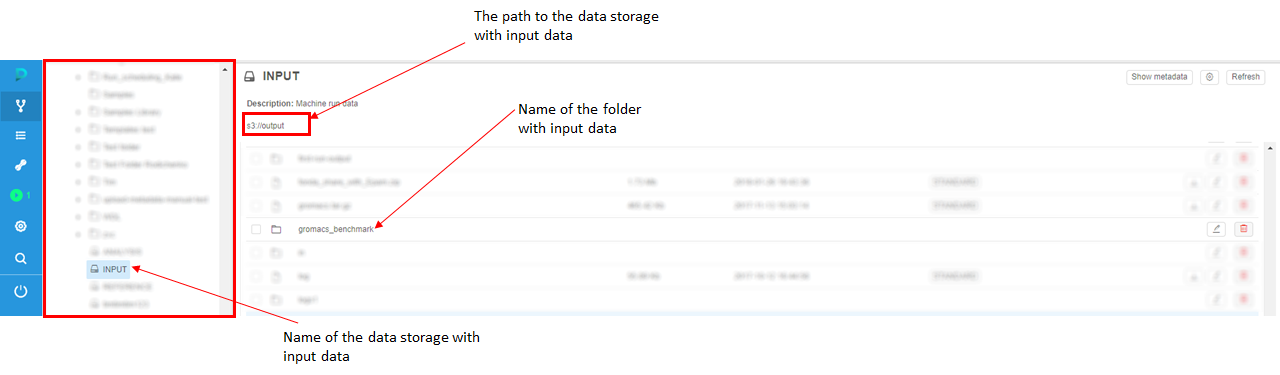
So, the first thing you need to do is to find a data storage in the Library tab on the left side of the screen. Then upload data to it.
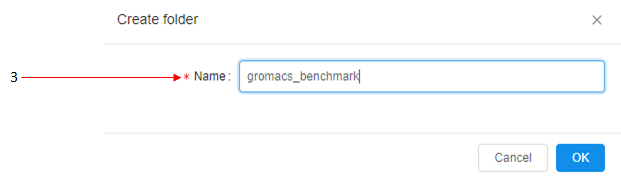
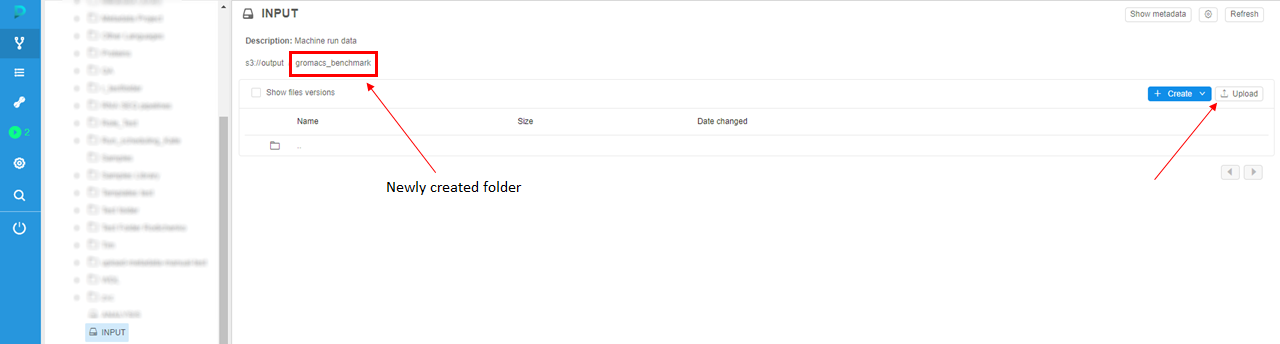
In this example, we will choose the data storage named "INPUT" (1) and then create a folder (2) named "gromacs_benchmark" (3).
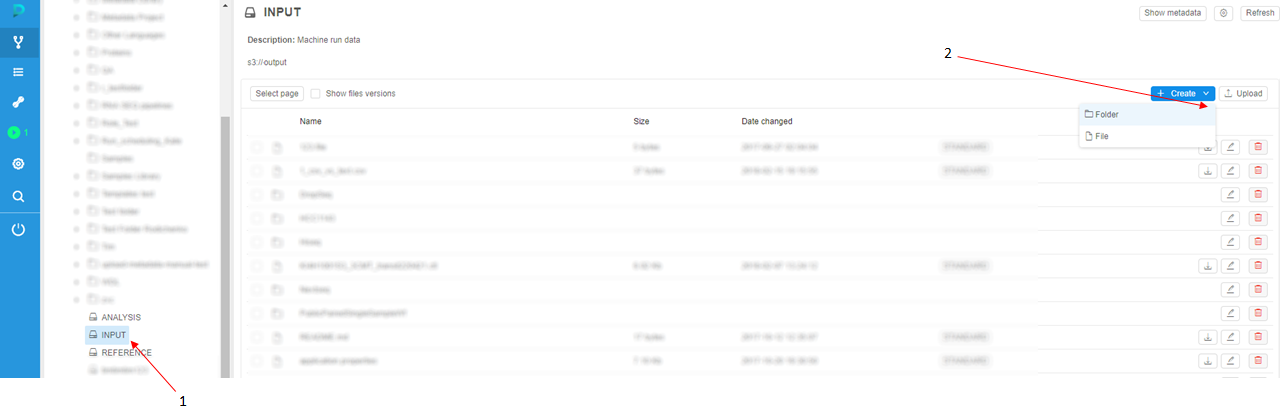
Then we will navigate to this folder by clicking on its name and click "Upload" button to upload your input data to the storage.
Note: make sure that the size of data doesn't exceed 5 Gb. To upload more than 5 Gb you shall use CLI (see details here).
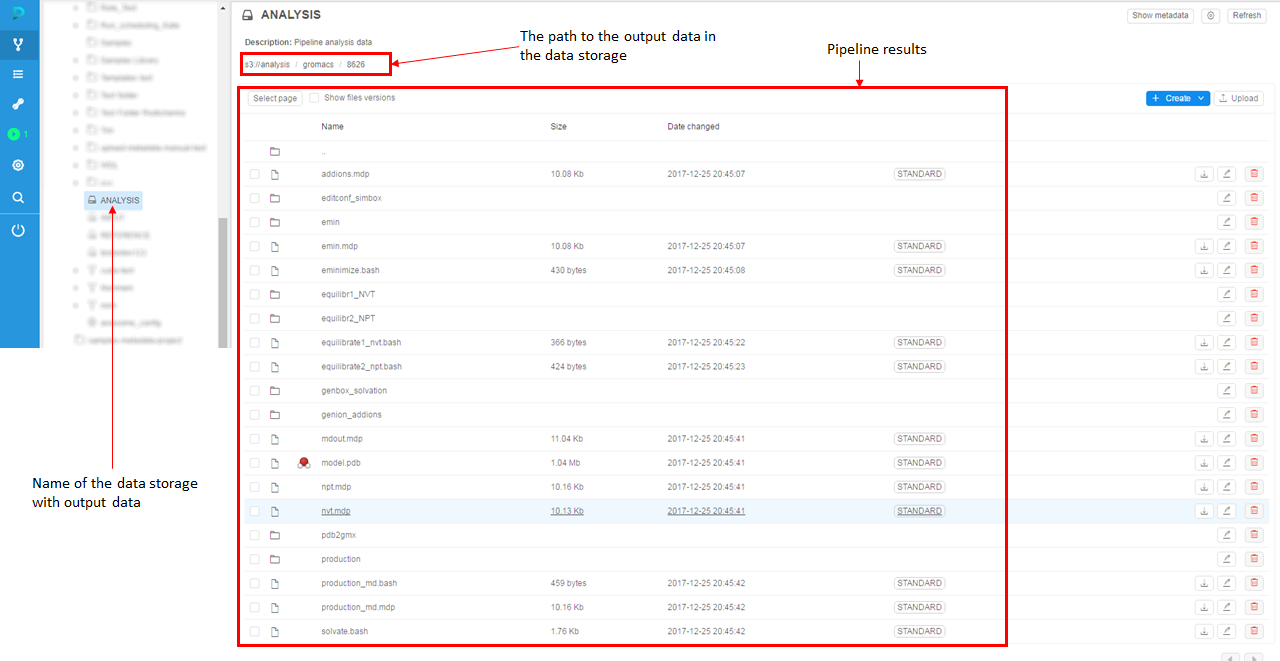
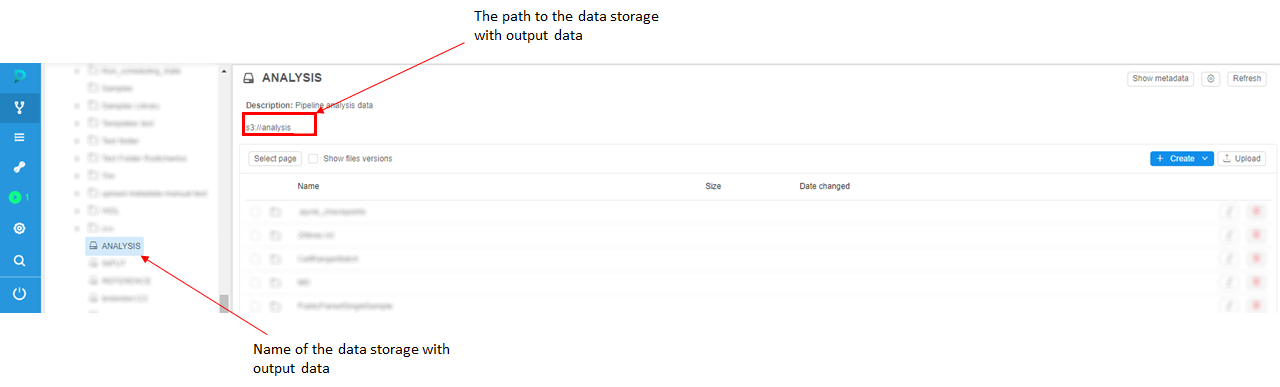
- Then decide where to put results of pipeline processing. A good practice is to not mix input and output data in a one data storage, so we will use another data storage for output data. In this example, we will use data storage named "ANALYSIS" to store pipeline output data.
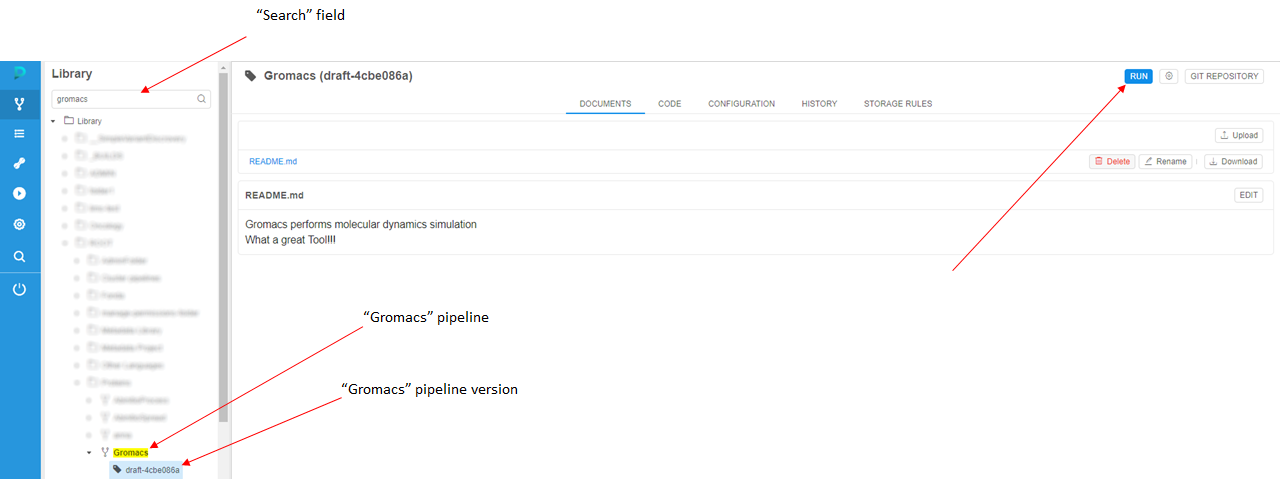
- In the "Search" field of the Library tab, find a pipeline that will process the input data. In this example, we will use the "Gromacs" pipeline that performs molecular modeling. Choose the pipeline version and click the Run button.
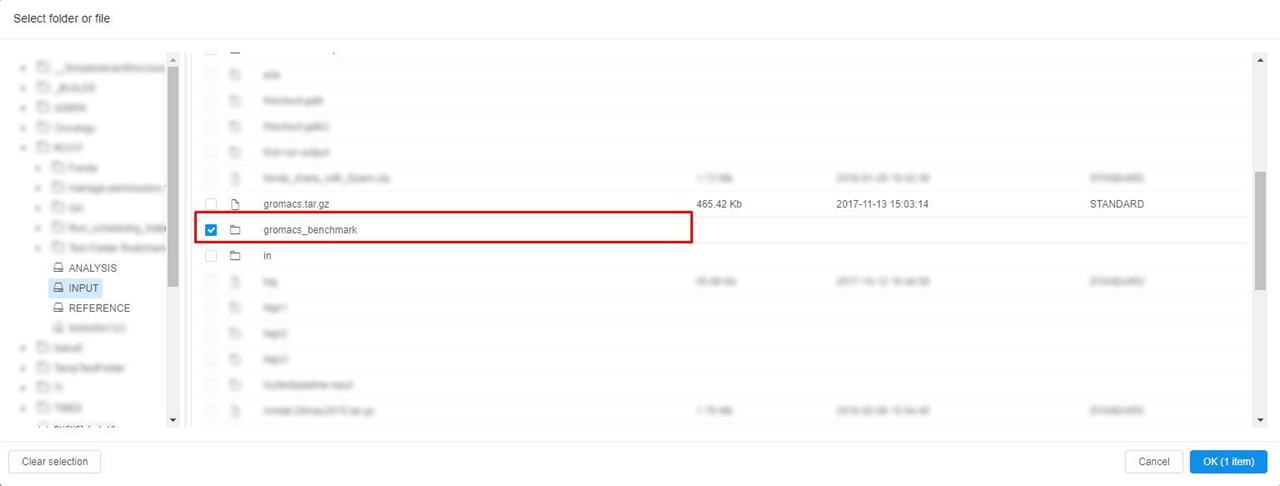
- On the "Launch a pipeline" page you'll see pipeline execution parameters. On the bottom, you'll see a "Parameter" section with the input parameter and output parameter.
Here you can specify the paths to your folders in storages, which you've created in step 1 and step 2.
Click the controls to choose your folders.

Check your folder in the list and click "OK".
Tip: If you want to create a new folder for the analysis, you can put/$RUN_IDat the end of the output string. The system will create a new folder with Run ID name. - Click the Launch button to run the pipeline.

- You'll be redirected to the Runs tab of the CP. Here you can find launched "Gromacs" pipeline.
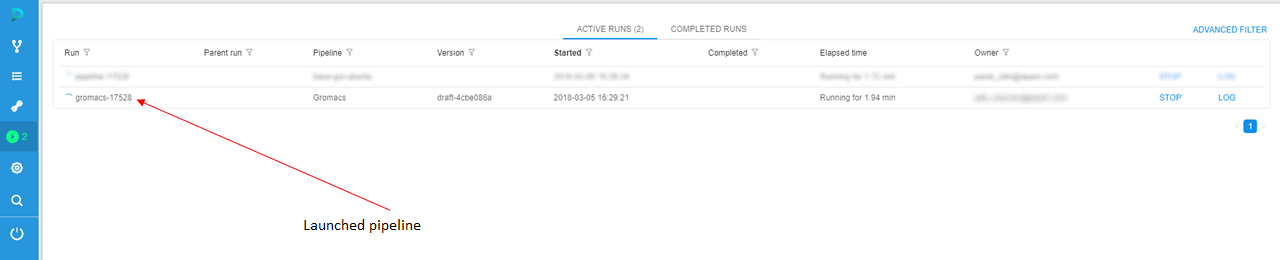
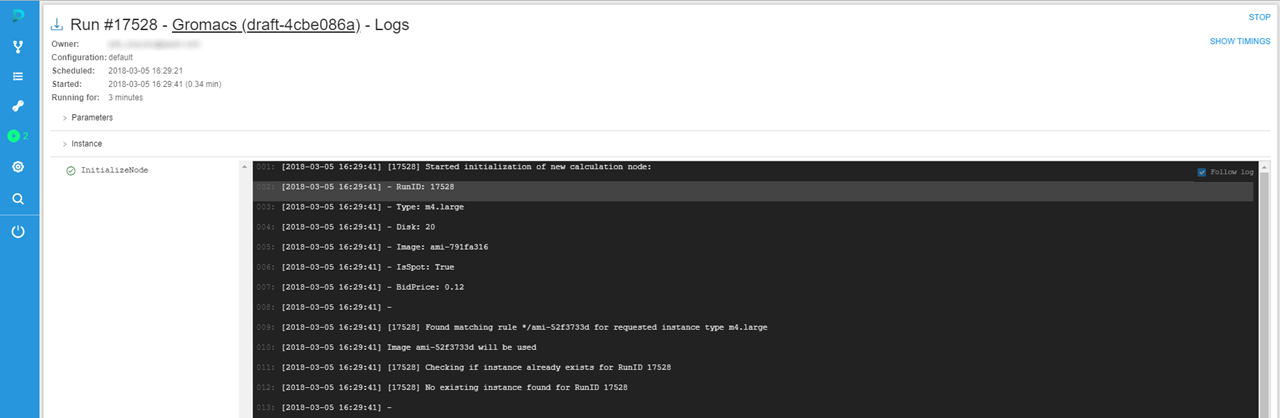
- Click a run with the pipeline name to see run logs.
- When all tasks of pipeline finish their execution, you'll be able to find the pipeline run in the Completed Runs section of the Runs tab.

- To see the output data, you shall navigate to the data storage with output data - ANALYSIS - and find the results of the pipeline run.